
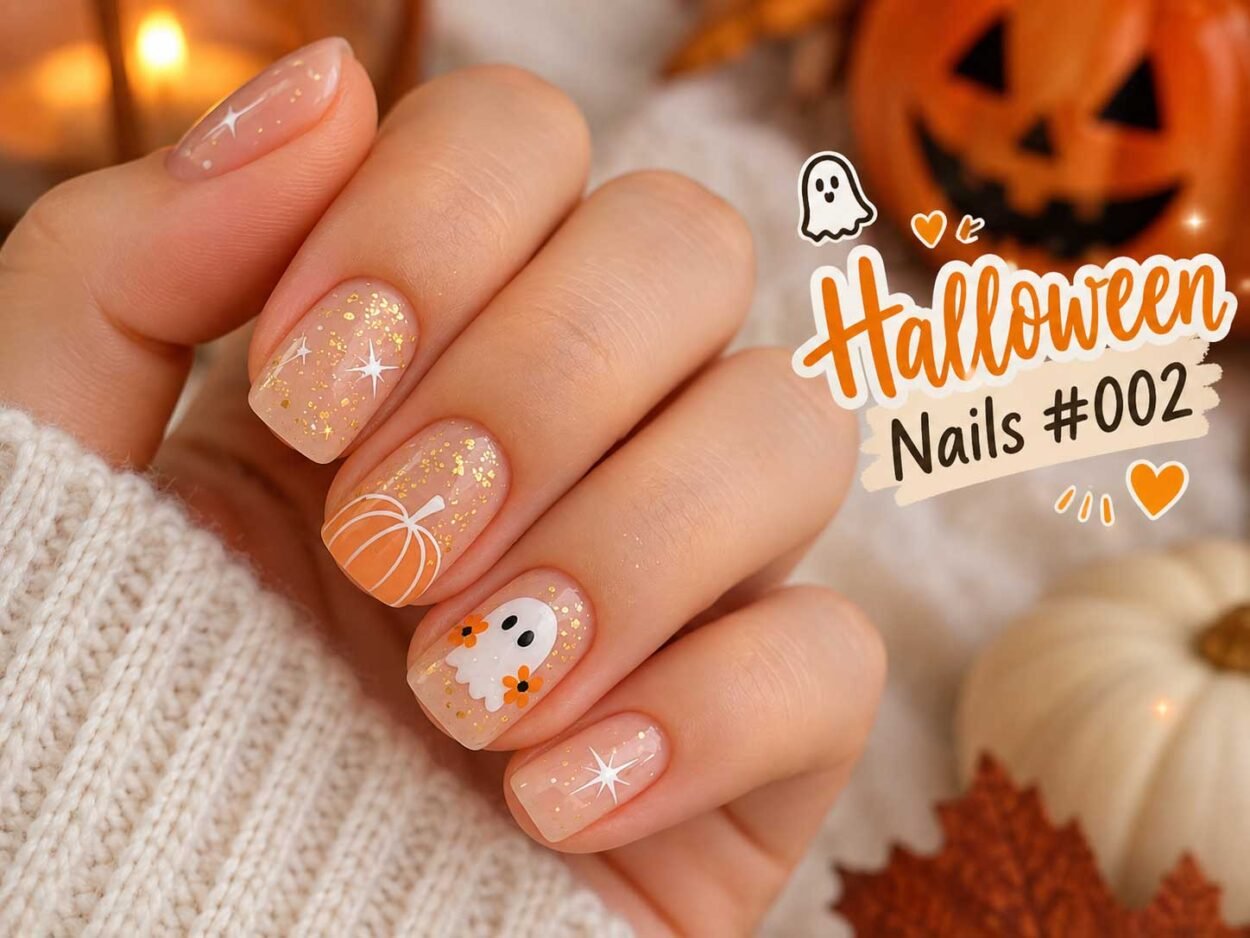
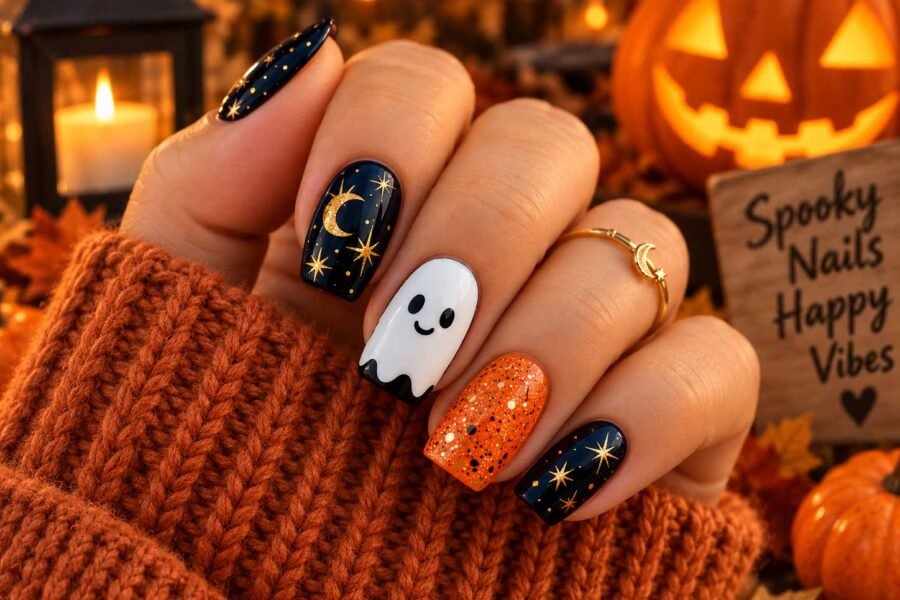
This Halloween manicure keeps things playful rather than overly spooky. The base is a soft, sheer nude with tiny gold flakes scattered across the nails, while a few accent nails bring in the Halloween details: a delicate starburst, a pumpkin, and a cute little ghost with orange flowers.
What I like about this set is that the designs don’t compete with each other. The gold glitter ties everything together, so even the more detailed ghost and pumpkin nails still feel like part of the same manicure.
What Makes This Design Work
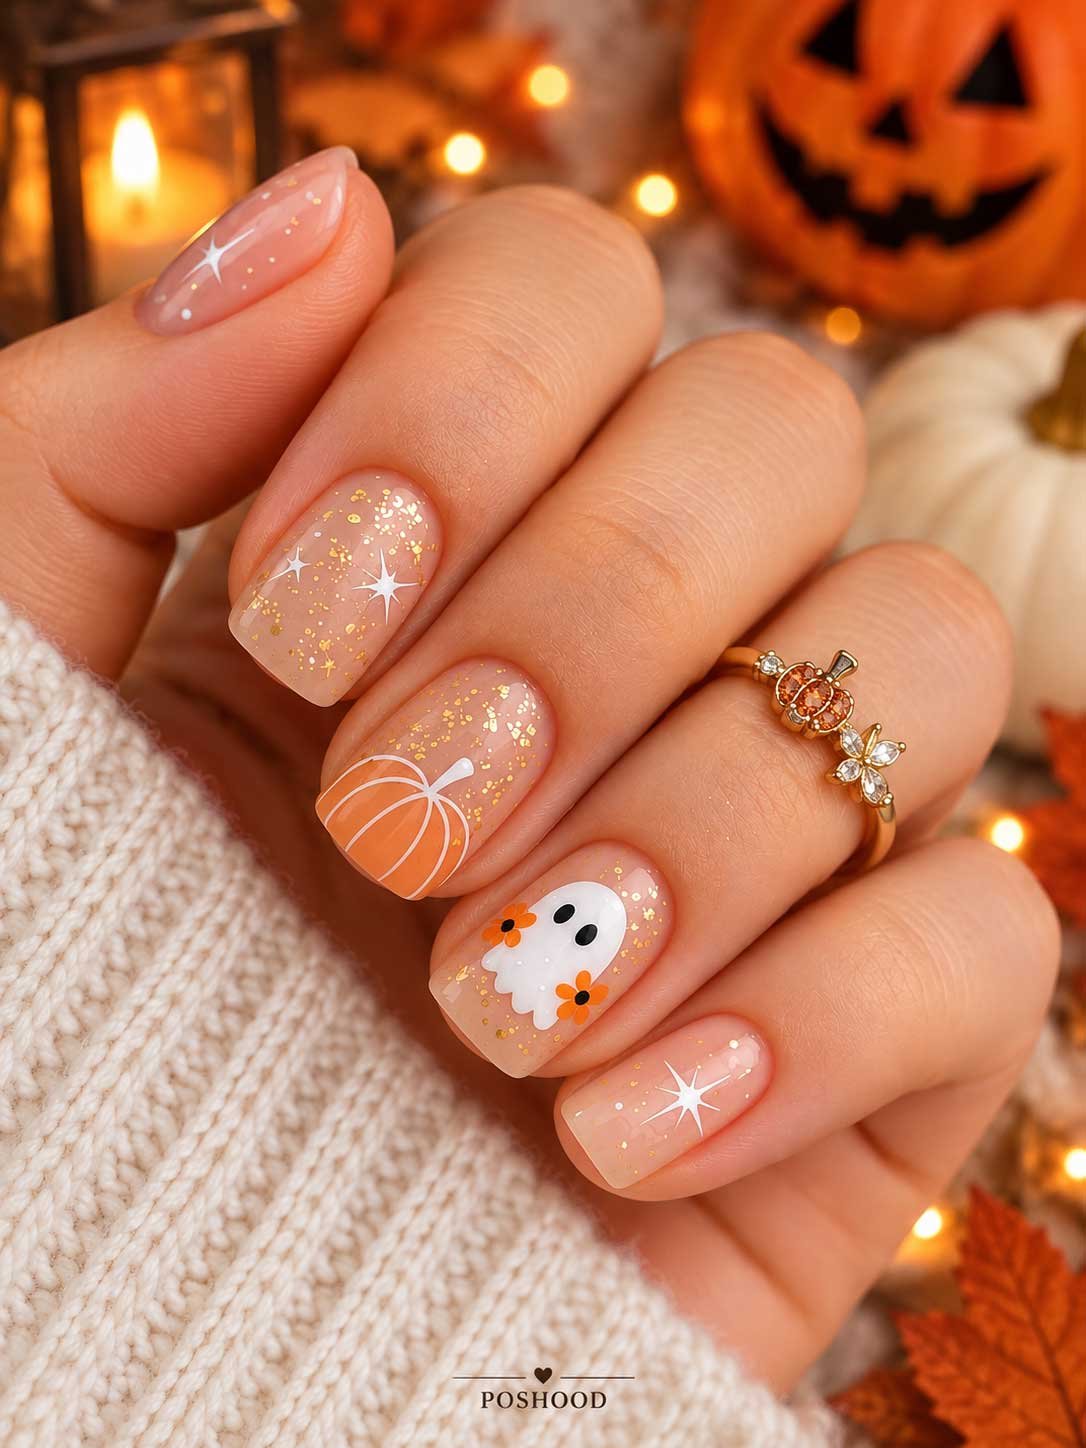
The combination of peachy nude polish, warm gold glitter, white details, and small touches of orange gives these nails a cozy autumn feel.
Most of the nails stay fairly simple, which makes the accent designs stand out. The starburst details add a little sparkle, while the pumpkin and ghost give the manicure its Halloween personality without making it look too busy.
The short, softly squared nail shape also makes the design practical for everyday wear.
What You’ll Need
- Nail file and buffer
- Cuticle pusher
- Base coat
- Sheer peachy-nude polish
- Fine gold glitter or gold flakes
- White nail polish or gel
- Orange polish
- Black polish
- Fine detail nail-art brush
- Dotting tool
- Glossy top coat
You don’t need a huge collection of nail-art tools for this look. A fine brush and a small dotting tool are enough for most of the details.
How to Recreate the Look
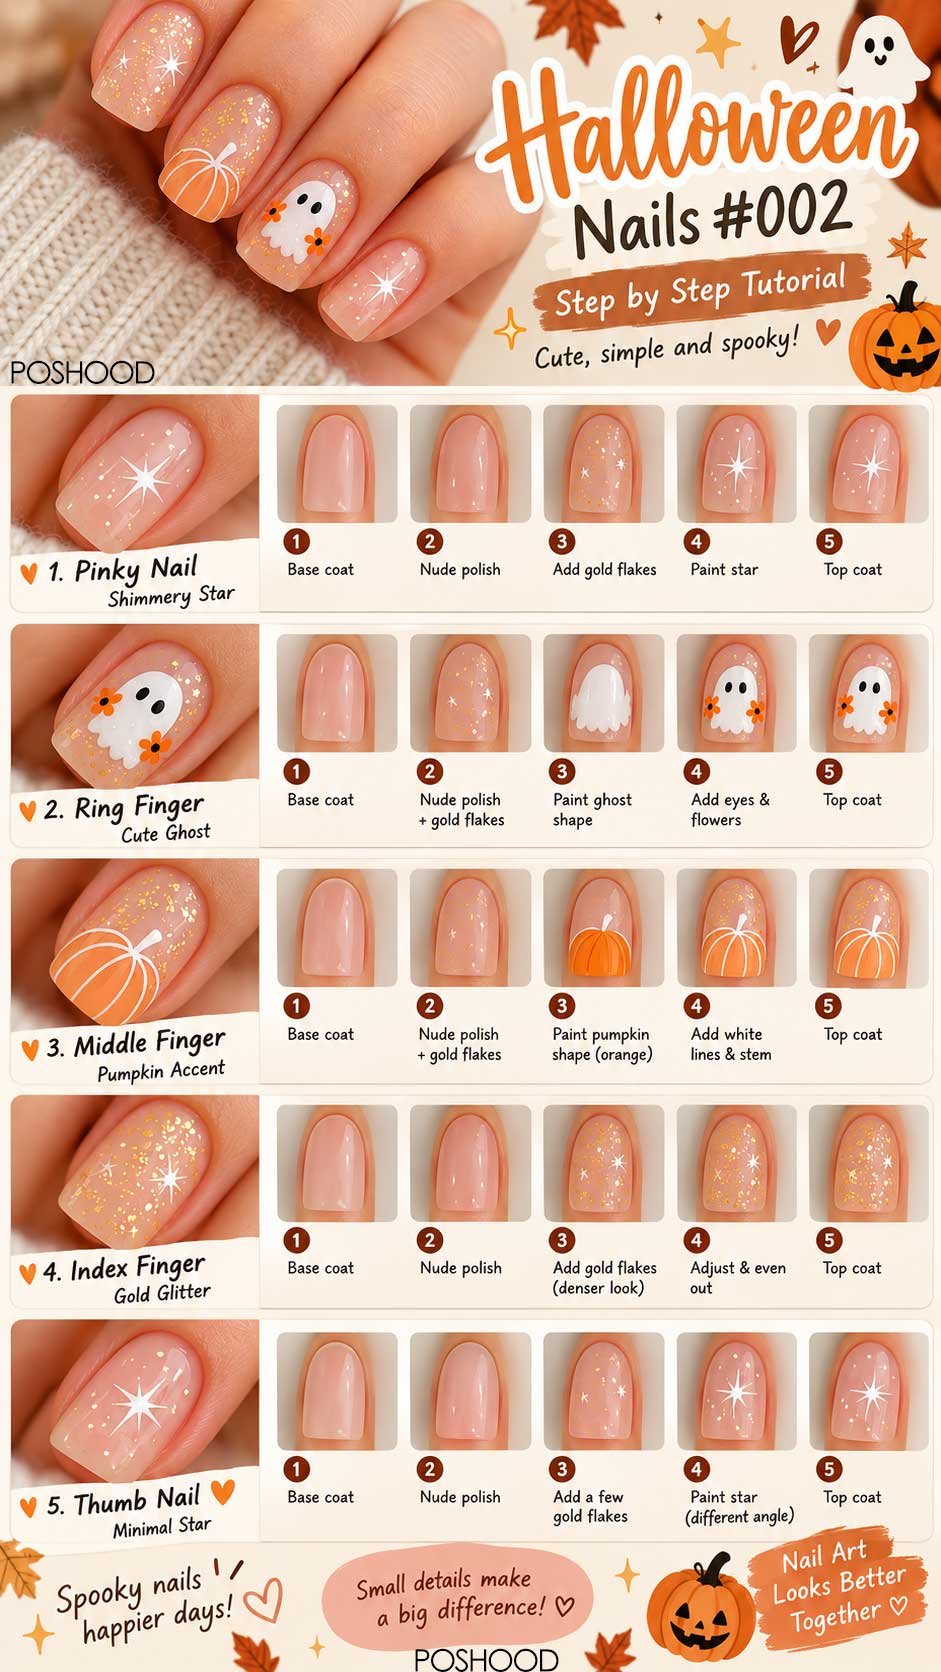
1. Prep and Shape
Start with clean nails. Push back the cuticles gently, remove any loose skin, and shape the nails into a short, softly squared shape.
Lightly buff the surface if needed, then wipe away the dust.
2. Apply the Base
Add a thin layer of base coat and allow it to dry completely. Follow with one or two thin layers of sheer nude polish until you have the soft peachy finish shown in the design.
If you’re using gel products, cure each layer according to the product instructions.
3. Add the Gold Glitter
Apply small pieces of fine gold glitter or flakes across the nails. Keep the placement scattered rather than covering the entire nail evenly.
This is one of those steps where less is more. The nude should still be clearly visible underneath.
4. Create the Starburst
On the simple accent nails, use a fine white brush to draw a small starburst. Start with a thin cross and add a couple of longer diagonal strokes.
Don’t worry about making every star identical. Slight differences actually make the manicure feel more hand-painted.
5. Paint the Pumpkin
For the pumpkin accent, create a small orange pumpkin near the lower portion of the nail. Add thin white curved lines to suggest the pumpkin sections and finish with a tiny stem.
Keep the pumpkin relatively small so it doesn’t overwhelm the nail.
6. Add the Ghost
For the ghost nail, paint a rounded white ghost shape over the glittered nude base. Once it’s dry or cured, add two small black eyes.
Tiny orange flower accents around the ghost add an unexpected pop of color and make this design a little sweeter.
7. Seal Everything
Once all of the artwork is completely dry, apply a glossy top coat. Take the brush over the free edge of each nail as well to help seal the design.
If you’re using gel, cure the final layer according to the manufacturer’s instructions.
Helpful Tips
The thin decorative lines are easier to control when you use very little polish on your detail brush. Too much product can make the pumpkin sections or starburst look thick.
For the gold flakes, try placing a few pieces around the artwork rather than directly underneath every design. This gives the manicure some breathing room.
And don’t rush the top coat. Dragging the brush repeatedly over the artwork can smear fine details before they’re properly set.
Easy Variations
- More subtle: Skip the pumpkin and ghost and use only gold flakes and white starbursts.
- More Halloween: Add tiny black bats or spiderwebs to one accent nail.
- Short nails: Make the pumpkin and ghost smaller and keep the artwork toward the center.
- More colorful: Swap the peachy nude for a warm beige or add a little burnt orange to the background.
Final Thoughts
This is a nice Halloween design if you want something festive without going all-in on dark colors. The sheer nude base keeps the manicure soft, while the gold sparkle, pumpkin, ghost, and tiny orange details bring in just enough Halloween charm.
The little details are what make this set work. Take your time with those fine lines, keep the glitter delicate, and let the glossy finish pull the whole manicure together.
Leave a Comment